Blog
Automatic Wire Nail Making Machine: How It Works
An automatic wire nail making machine turns a coil of wire into a finished nail in a fraction of a second. Most owners know what goes in and what comes out. Far fewer know exactly what happens in between, and that gap costs money every time a machine starts throwing bent nails or off-centre heads.
This guide opens up the machine. We have designed and built wire nail machines in Rajkot since 1975, so we know every part by its wear pattern. You will learn the main parts, the full cycle step by step, what controls nail quality, common faults and their causes, and a daily maintenance routine.
What Is an Automatic Wire Nail Making Machine
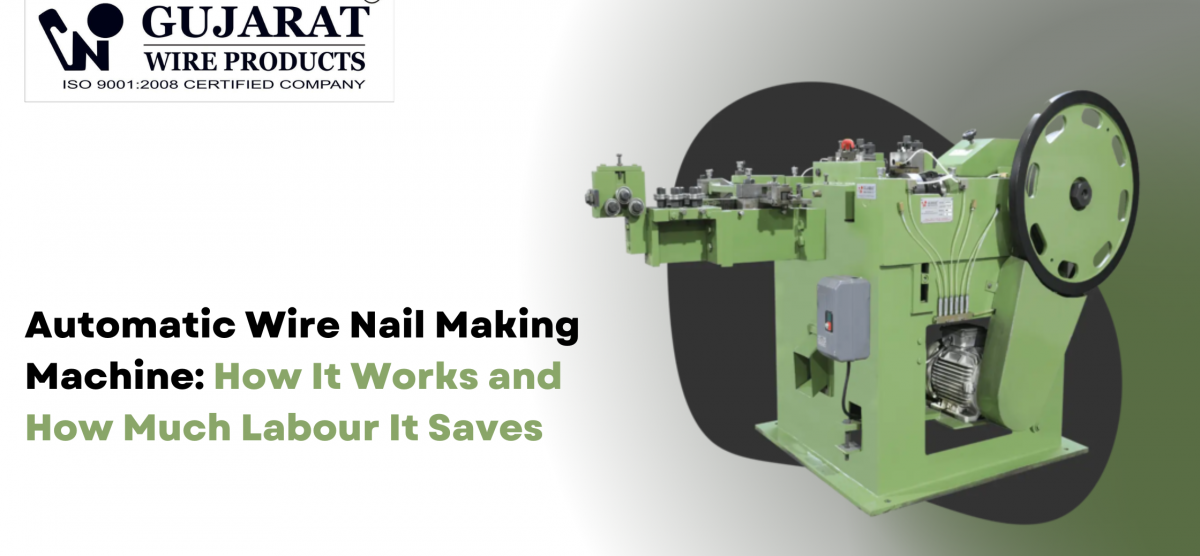
It is a cold-forming machine that makes one nail per revolution of its main crankshaft. Once the coil is loaded and the machine is set, it feeds, grips, heads, cuts and ejects without manual steps.
On our conventional range, that cycle repeats between 150 and 500 times a minute, depending on nail size. On the PLC-controlled GHS90 it reaches 760 times a minute.
Main Parts and Their Jobs
Wire Pay-Off Stand
Holds the wire coil and lets it unwind freely. A stand that jerks or snags causes uneven feed.
Straightening Rollers
A set of rollers in two planes removes the curve the wire picked up on the coil. Straight wire is the starting point for straight nails.
Feed Mechanism
Pushes the wire forward by the exact nail length on each stroke. Feed length is adjustable to change nail size.
Gripping Die
Two die halves clamp the wire firmly while the head is formed. The die bore matches the wire diameter, and its face shapes the underside of the head.
Header Punch
Strikes the end of the gripped wire and upsets it into a head. The punch face decides head shape: flat, chequered, countersunk or other patterns.
Cutters
Two cutting tools close from opposite sides of the wire. They form the point and separate the finished nail from the wire in one action.
Crankshaft and Flywheel
Drive the whole cycle. The flywheel stores energy so the header punch strikes with consistent force.
Ejector and Chute
Clear the finished nail from the tooling area and guide it into a collection bin.
Lubrication System
Keeps slides and bearings oiled. High speed machines use forced or automatic lubrication.
How It Works: Step-by-Step Cycle
Each nail goes through this sequence in a single crank revolution:
- Feed. The wire advances through the straightening rollers by one nail length.
- Grip. The gripping die closes on the wire, leaving a short length sticking out for the head.
- Head. The header punch strikes the exposed end and forms the nail head against the die face.
- Release. The gripping die opens and the punch withdraws.
- Advance. The wire, now with a head on its end, moves forward again by the nail length.
- Cut and point. The cutters close behind the new nail, form its point and separate it from the wire. The cut also leaves a fresh end ready for the next head.
- Eject. The finished nail drops or is pushed into the chute.
The point of one nail and the head of the next are formed at the same cutting position. That is why cutter setting affects both ends of the nail.
What Controls Nail Quality
Most quality problems trace back to a short list of variables.
Wire Quality
- Diameter tolerance: wire that varies in thickness gives uneven heads and slipping in the die
- Surface condition: scale or heavy drawing soap residue wears tools fast
- Hardness: wire that is too hard cracks under the header punch
Tool Condition
Worn gripping dies let the wire slip during heading, which gives short or uneven heads. Blunt cutters leave burrs on the point. Carbide tools, used on our GHS90, hold their edge far longer than standard tool steel.
Settings
- Feed length sets nail length
- Head length setting, the wire left out of the die, sets head diameter and thickness
- Cutter alignment sets point shape and symmetry
Lubrication and Temperature
Dry slides wear unevenly and throw the tool alignment off. On high speed machines, this shows up quickly as drifting nail length or head shape.
Common Faults and Their Causes
| Fault | Likely cause | What to check |
| Bent nails | Wire not straight, rollers out of setting | Straightening roller pressure and alignment |
| Off-centre heads | Gripping die misaligned or worn | Die seating and bore wear |
| Thin or cracked heads | Too little head length, wire too hard | Head length setting, wire hardness |
| Burrs on points | Blunt or misaligned cutters | Grind or replace cutters, reset alignment |
| Uneven nail length | Feed slipping, wire diameter varying | Feed mechanism grip, wire tolerance |
| Nails sticking in tooling | Ejector timing or worn chute | Ejector setting and chute condition |
What Changes in a High Speed Automatic Machine
The basic cycle is the same. The differences are in how the machine holds that cycle at higher speed.
- Frame and balance: a stiffer, balanced frame limits vibration at high crank speeds
- Automatic lubrication: oil reaches every slide on a set schedule without operator input
- Sensors: our GHS90 uses seven sensors to monitor safety conditions and count nails
- PLC and drive control: speed and stops are controlled electronically, so a fault halts the machine before it damages tooling
- Carbide tooling: longer tool life keeps the machine running between changes
The labour effect is large. On the GHS90, one skilled operator can look after up to eight machines.
Daily Maintenance Routine
A short routine at the start of each shift prevents most stoppages.
- Check oil levels and confirm lubrication is reaching all points.
- Inspect gripping dies and cutters for chips or wear.
- Clean scale and drawing residue from the tooling area.
- Check straightening roller settings with a test run of a few nails.
- Measure a sample of nails for length, head diameter and point shape.
- Listen for new noises from the crank or flywheel area.
Keep a log of tool changes. It shows how long each set lasts on your wire and helps you plan spares.
FAQs
How many nails does an automatic wire nail making machine make per minute?
It depends on the model and nail size. Our conventional machines run from 150 nails per minute on large nails to 500 on small ones. The PLC-controlled GHS90 reaches up to 760 nails per minute.
Can I change nail size on the same machine?
Yes, within the machine’s wire and length range. You change the gripping die and cutters to match the wire, then reset feed and head length. Grouping production by size cuts changeover time.
Why are my nails coming out bent?
Bent nails usually come from wire that is not fully straightened. Check the straightening roller settings and the pay-off stand. Worn feed parts can also push the wire unevenly.
How often should cutters be sharpened?
It depends on wire hardness and cleanliness. Most units sharpen when burrs start to appear on points. A grinder machine in the plant lets you sharpen cutters in-house and keep a spare set ready.
Does the machine need skilled operators?
Daily running needs basic training. Setting tools, adjusting head length and diagnosing faults need a skilled setter. Many plants have one skilled setter supervising several machines.
Conclusion
An automatic wire nail making machine repeats a simple cycle: feed, grip, head, cut and eject. Nail quality depends on straight, clean wire, sharp and aligned tools, correct settings and steady lubrication. A daily routine and a tool-change log keep output steady.
If your nails are showing any of the faults above, send us a photo and your machine details. We will help you find the cause.
About Gujarat Wire Products
Gujarat Wire Products has designed and built automatic wire nail making machines in Rajkot since 1975. Our range covers conventional GN machines, high speed GHN machines and the PLC-controlled GHS90. We make the gripping dies, cutters and header punches that run in them, so tooling always matches the machine. Our machines are at work across India and in Africa, the UK, Europe and Asia.
Our promise: machines that run steadily, tools that fit right, and support that knows the machine inside out.